Tuning Indexing Service For Maximum Performance
Home | About Us | Products | Support | Contact Us | Library
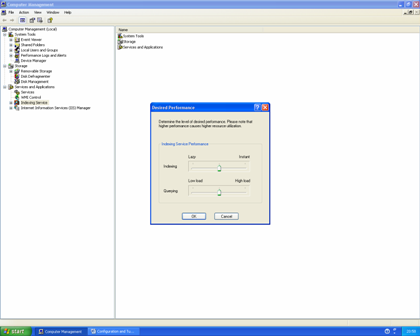
Indexing service itself can be tuned to set a) how vigorously it keeps up with the creation of new files and the changing of existing files in shares/folders it is watching b) how much resource it reserves on the host server to utilize when answering queries .
If you are running with your hardware already quite stressed it is a good idea to start at the lower settings, and then work your way over to the higher ones, watching your disk queues with performance monitor over a period of time.
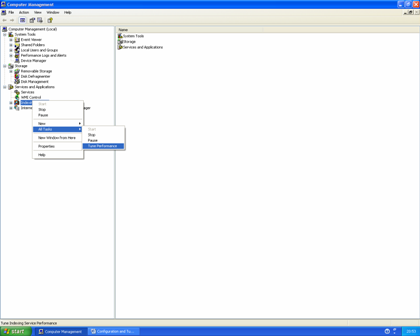
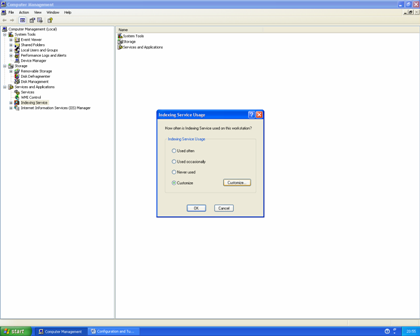
To tune the performance of Indexing Service right click on your “My computer” Icon and To tune the performance of Indexing Service right click on your “My computer” Icon and then click on “Manage”. Expand out “Services and Applications” and then right click on “Indexing Service”. Click on “All Tasks” and the click on “Tune Performance”. If “Tune Performance” is grayed out you will need to stop Indexing Service before you can access it. You can do that by right clicking on “Indexing service” and clicking on stop.

Once you have finished making adjustments you will need to right click on “Indexing Service” and click on “Start” to start Indexing Service again. 
A balance between the performance of your hardware, the size/number of files your indexing, and the number of searches that will be performed. To give you an idea, in our experience a file server with a single processor (1.0ghz PIII), 512MB Ram , 4 Ultra SCSI disks (1 hot spare) in a raid 5 and an ok SCSI controller can serve 30gb of Word/Excel type files to 100+ users on the middle settings without to much trouble.
The exact results you see though will vary as no two installations are the same. Only experimentation will really prove what settings are good settings for you. As already mentioned, start at the lower settings and gradually work you way over to the right. Once your done click on 'Ok', then start up Indexing service again by right clicking on "Indexing Service" and clicking on 'Start'
